Wiping your Raspberry Pi - Part 2
Connecting up all the parts are easy enough, but because of the method we need to use to wipe the Pi, I suggest plugging in the Pi in this sequence:
Connection Method
1. Connect Keyboard, Network to the net and Monitor
2. and last of all, the power.
For now, don't worry about the sound. We just need to get it up and running to start to wipe the Pi.
Wiping your Pi
As the unit is starting up, the monitor will firstly flash a rainbow square, and then will boot to a recovery mode screen that will allow you to install a new OS. See below.
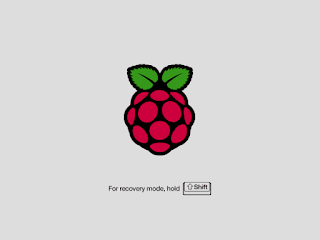 Hold down Shift, as the screen says, but you only have a second to do this or it will continue to boot to the current OS that might be installed on there. If you miss holding Shift, as it starts the local OS press 'Ctrl & Alt and Del' a few times. This will cancel the boot of that OS and restart the Pi. Then this time, you should be able to catch the recovery screen.
Selecting an OS
With this version of Pi that I have (Raspberry Pi B+ v1) and the package I got, my Micro SD already has NOOBS with a variety of OS's on it. But you can easily go to the RPi website and download a new version of NOOBs.

You will need to find the current package (marked by a 'x' on the left side of the description) and unselect it. (Use your Spacebar Key to select/unselect) Then using your arrow keys again, find the vanilla installation package for Raspbian and select that. You should see the x next to the description and also an indicator for a network connection on the right hand side. This will download the latest installation packages for Raspbian.
When your ready, press the 'i' key to start the install sequence. It should show you the following screen, saying that it will 'wipe the current installation and all data and install the selected OS'. Press enter or the 'y' key to accept the installation. (See below)

The reinstall of the OS will take about 10 to 20 minutes depending on your net connection as well. In the meantime, a progress bar and information about Pi will run on screen.

When finished, the screen will display the following screen, saying its installed successfully.

Click Enter on the keyboard, and the system will restart to a configuration mode, for the first time you have started your Raspbian OS on your Pi.
Next: Initial Configuration of Your Pi
Connection Method
1. Connect Keyboard, Network to the net and Monitor
2. and last of all, the power.
For now, don't worry about the sound. We just need to get it up and running to start to wipe the Pi.
Wiping your Pi
As the unit is starting up, the monitor will firstly flash a rainbow square, and then will boot to a recovery mode screen that will allow you to install a new OS. See below.

Selecting an OS
With this version of Pi that I have (Raspberry Pi B+ v1) and the package I got, my Micro SD already has NOOBS with a variety of OS's on it. But you can easily go to the RPi website and download a new version of NOOBs.
(NOOBS - is an easy operating system installer which contains Raspbian. It also provides a selection of alternative operating systems which are then downloaded from the internet and installed.)When you finally get to select the OS's available, use your keyboard's arrow keys to move up and down the OS descriptions. Amongst them will be all the vanilla installations for the OSs and also the current package installed.

You will need to find the current package (marked by a 'x' on the left side of the description) and unselect it. (Use your Spacebar Key to select/unselect) Then using your arrow keys again, find the vanilla installation package for Raspbian and select that. You should see the x next to the description and also an indicator for a network connection on the right hand side. This will download the latest installation packages for Raspbian.
When your ready, press the 'i' key to start the install sequence. It should show you the following screen, saying that it will 'wipe the current installation and all data and install the selected OS'. Press enter or the 'y' key to accept the installation. (See below)

The reinstall of the OS will take about 10 to 20 minutes depending on your net connection as well. In the meantime, a progress bar and information about Pi will run on screen.

When finished, the screen will display the following screen, saying its installed successfully.

Click Enter on the keyboard, and the system will restart to a configuration mode, for the first time you have started your Raspbian OS on your Pi.
Next: Initial Configuration of Your Pi


Comments
Post a Comment