Creating a TorrentPi - Installing the Main OS
For this part of the work-thru, I wanted my Raspi to have as little on it as possible, so more of it could be focused on Torrenting Legal Content.
For this part of the project, you will need the following:
1 x Raspberry Pi 2+
1 x 5v/2A power adaptor for Raspberry Pi
1 x 8 Gb MicroSD card
1 x MicroSD to USB Adaptor
1 x HDMI capable monitor and HDMI cable
1 x Wireless keyboard/ Mouse
1 x Wireless Adaptor or Lan Cable for internet connectivity
Also a PC or Laptop to help with installing the OS.
Setting Up
First off, we need to find an OS that we can use with the Raspberry Pi. I have chosen to use Raspbian as its comes with a light edition:
https://www.raspberrypi.org/downloads/raspbian/
Download the lite edition, which in my case and at the time of setting up was:
Raspbian Stretch Lite - 2017-11-29 Ver 4.9
While you are downloading the zip file, download the OS to microsd software:
Etcher - 64 bit edition 1.3.1
Install this once it has finished downloading.
Once both are downloaded, we begin the process of uploading the OS to the MicroSD and in to the Raspberry Pi.
Now, at this time I used a very handy adaptor that I got when I purchased a microsd a while ago.

For this part of the project, you will need the following:
1 x Raspberry Pi 2+
1 x 5v/2A power adaptor for Raspberry Pi
1 x 8 Gb MicroSD card
1 x MicroSD to USB Adaptor
1 x HDMI capable monitor and HDMI cable
1 x Wireless keyboard/ Mouse
1 x Wireless Adaptor or Lan Cable for internet connectivity
Also a PC or Laptop to help with installing the OS.
Setting Up
First off, we need to find an OS that we can use with the Raspberry Pi. I have chosen to use Raspbian as its comes with a light edition:
https://www.raspberrypi.org/downloads/raspbian/
Download the lite edition, which in my case and at the time of setting up was:
Raspbian Stretch Lite - 2017-11-29 Ver 4.9
While you are downloading the zip file, download the OS to microsd software:
Etcher - 64 bit edition 1.3.1
Install this once it has finished downloading.
Once both are downloaded, we begin the process of uploading the OS to the MicroSD and in to the Raspberry Pi.
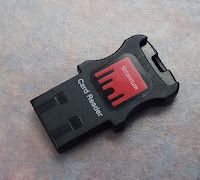
Now, at this time I used a very handy adaptor that I got when I purchased a microsd a while ago.

As you can see, its a card reader for microsds, so for this project its handy as.
Pop any handy microsd (preferably 8gig) into it and plug it into your pc. Start up the Etcher program and you should be ready to add all the parts together.
Follow the instructions on screen and add the image or the raspbian zip file you got earlier, select the usb reader and then press Flash.

This can take a while as it wipes and then creates new partitions and transfers files to the usb. If during the process, a window opens asking you to format a new drive or drives, ignore them and close them. They are partitions that added during.
During the copying time, maybe setup your raspberry pi, but don't power it up. Connect up the screen, keyboard and mouse and wireless or network cable.
Wait till the end when its finished, and it will tell you that the drive is flashed. Pull out the usb reader, as it will no longer be attached to your pc, as it gets ejected at the end.
Take out the microSD from the adaptor and fit it in to the Raspberry. Plug in the power adaptor and let it boot up.
Next: Configuring the Pi


Comments
Post a Comment