Posts

Showing posts with the label Raspberry Pi and Pianobar

Using Pandora & Adding Remote Control - Part 6

Image
To start up Pianobar, just type: pianobar and it should start loading and look like below. From here the controls are described on screen, on how to use it. Sound Card Notification Problem I had a problem with it announcing which sound card it was using every time it changed a song. To fix this, we have to edit another file to stop this from displaying. So (q) quit out of Pianobar and back at the terminal prompt, we need to type: sudo cp /usr/share/alsa/alsa.conf /usr/share/alsa/alsa.conf.bak This will make a backup of the sound config file. Then: sudo nano /usr/share/alsa/alsa.conf Using Nano to open up the file and we need to find a line of script that looks like this: pcm.front cards.pcm.front Its mid-way in the file. Change it to this pcm.front cards.pcm.default This should remove that notification. Run Pianobar again and it should be now playing properly. Adding Remote Control Now that we have Pianobar working properly and how w...
Installing Pianobar - Part 5

Image
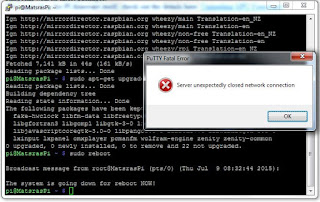
After connecting with PuTTY, remotely, to the PI. Our first task is to upgrade this version of Raspbian with its latest packages. (Important Note: Linux and Raspbian are case sensitive, so use caps or normal letters when typing where needed) (For upgrading the PI firmware itself, check out the details here: Upgrading GPU Firmware ) Updating and Upgrading Raspbian So from the prompt: (Which should look like pi@MatsrasPi ~$ ) Type in: sudo apt-get -q -y update (Or you can copy and paste the command into the window. Do this by highlighting and copy the command, then switch to Putty and use the right-hand mouse button, which will automatically paste in the command.) After that command, which can take up to 5 minutes, do the next command: sudo apt-get -q -y dist-upgrade This will take a lot longer (20-30 mins), as it will need to download the latest packages. It may also ask you if you would like to download these upgrades, so type 'y' and press enter on the ...

Remote Software and Connecting - Part 4

Image
Now that we have the IP address for the Raspberry Pi, we need to use another pc to remote into it and complete some of the tasks. Remote Software To connect to the Pi, we need to use software that can use the SSH method of connection. You will need to download the program called PuTTY. Downloading Download site: http://www.chiark.greenend.org.uk/~sgtatham/putty/download.html We only need the Intel x86 version, so just click on the hyperlink title 'putty.exe' and ignore the other links next to it. This should automatically ask if you want to save the file locally. Save it, and once it's downloaded, run the application. Configuring PuTTY Once the application has started, you should see the options available, like below.   Ignoring any advance options, all we need to focus on are the areas indicated above. Host Name (or ip address) : xxx.xxx.xxx.xxx - In here will be the address we wrote down earlier. The one above is just an example. Port : 22 - Th...

Initial Configuration of Your Pi - Part 3

Image
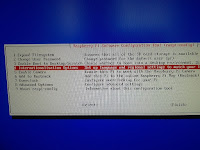
This part will be picture heavy, to show you the menus and options you need to choose. Main Menu of  Config Mode As you can see, there are a few menus options available for changing how your pi will start up and what else your pi will do. First step will be to change the location of the Pi to your actual location. this will help with accessing time settings and downloading packages from fast local sources instead of slower distant locations. Regional Settings and Timezone As you can see from the main menu screen below, you will need to select the option for 'Internationalisation options'. Using the Arrow Keys to move up and down the menus, hit the enter key when you have gotten to the option you want to select. From here you need to choose 'Change Locale' Depending on where you are, you will need to change from the default locale, which is usually the en_US to whatever locale you are in. For me, I have to change to the NZ locale. So I needed to unsele...

Wiping your Raspberry Pi - Part 2

Image
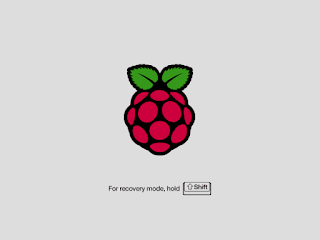
Connecting up all the parts are easy enough, but because of the method we need to use to wipe the Pi, I suggest plugging in the Pi in this sequence: Connection Method 1. Connect Keyboard, Network to the net and Monitor 2. and last of all, the power. For now, don't worry about the sound. We just need to get it up and running to start to wipe the Pi. Wiping your Pi As the unit is starting up, the monitor will firstly flash a rainbow square, and then will boot to a recovery mode screen that will allow you to install a new OS. See below. Hold down Shift, as the screen says, but you only have a second to do this or it will continue to boot to the current OS that might be installed on there. If you miss holding Shift, as it starts the local OS press 'Ctrl & Alt and Del' a few times. This will cancel the boot of that OS and restart the Pi. Then this time, you should be able to catch the recovery screen. Selecting an OS With this version of Pi that I have (Raspb...

Raspberry Pi & Pandora with Remote - Part 1

Image
I listen to music all the time while I'm working, and after I found Pandora I just had to get a subscription. I've never subscribed to any online service, so that tells you how much I really like this service. (You don't have to subscribe to pandora to use the following software. It can be used with a free login too.) Silence to me... is boring as hell/stretches out time/ and I like to sing (not that well, but I don't care who's listening), and music helps me concentrate. So during the day, I usually work in my office on different things. But sometimes I need to stop my main PC, so I can use it for parts and testing, which leaves me without any music. I brought a Raspberry PI B+ with the package that included the 8 gig card with NOOB os's on it and a case. (I didn't get the wifi addon, which I regret now) I originally wanted to see if I could use it as a torrenting pc, but after much mucking around, I didn't get it sorted. But recently I thoug...